Showing posts with label tutorial. Show all posts
Showing posts with label tutorial. Show all posts
How to install the Basic layout
Okay, so as I promised, a video tutorial for the ones who want to install the "Basic layout" I made for you! Sorry If I make any grammar or pronunciation mistake D: I am still learning English (: Also, if you have any doubt leave me a comment and I'll be glad to help you! xoxo.
 Labels:
Blog design,
digital,
tutorial,
videos
Labels:
Blog design,
digital,
tutorial,
videos

Doodle you!

Well, it has been a small time since I started editing my blog's photos, so I want to show you how to make your own!

1. A photo to edit 2. Pixelmator 3. A tablet, mine is a Bamboo tablet.


First edit the levels of light and color of your image to make it prettier. Then open Pixelmator with your photo and edit it... just have fun! After that, you are done. The possibilities are endless so just develop your own style and enjoy!
Oh, and here is one of the photos I edited from the winners of yesterday!

By the lovely Stacie Grissom.
Have a lovely day!
xoxo.
Labels:
DIY,
Photography,
tutorial
DIY Waterfall Braid (video)
Hey there!
Time ago I made a small tutorial for waterfall braids.
A lovely reader asked for a video tutorial! So, here it is. (:

I hope you enjoy it! (:
With so much love, Monica.
Time ago I made a small tutorial for waterfall braids.
A lovely reader asked for a video tutorial! So, here it is. (:
I hope you enjoy it! (:
With so much love, Monica.
Blurry photos for this christmas!
Hi there!
 |
| via |
I am really happy to post about photography again!
Well, I've always thought on how to achieve these lovely pictures... of lighting in circles!!
So... I experimented with a kind of lamp, it looks like the one on the right.
I actually love how these kind of lamps look, it is kind of vintage!
The house where I actually live, is 45 years old! So it had lots of antiques when we bought it... even some clothes!
Do you like finding those kinds of treasures too?
But well, after changing the focus of my camera I got this...


Some little tips and observations for taking this kind of photos:
- Keep in mind that you need some light that comes from specific sources, the more you have, the better the picture looks
- The best pictures are with colorful lights!
- Try to move your camera in a way that the lights sort of reflect
- Use a good lens, the zoom ones normally don't work for this.
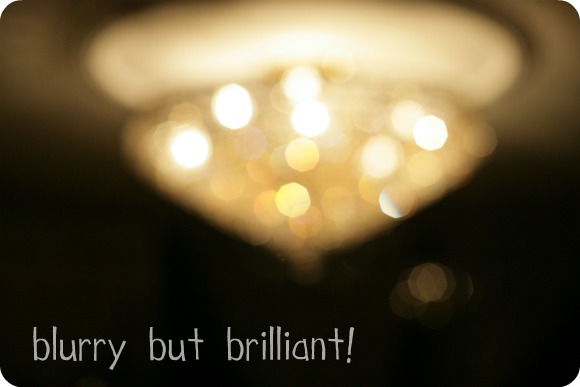
I really hope this works! If you have pictures like these ones, send me an email! I would love to include them in the post (with a credit, of course)
I am really shire I'll post some of this pictures when our little christmas tree is ready! (I called him Arthur..)
Do you like to call thing too? ha ha, I know it is weird, but it makes some things a bit more special.
xoxo. Monica
Labels:
ideas,
inspiration,
lessons,
Photography,
tutorial
DIY: Nutella chocolates
Hi lovelies!
Yesterday I was hungry, well I wanted something with sugar... you know, a dessert! P:
So I looked my little (huge) nutella jar! I don't know if you fell weird eating it because it is too sticky, even when you eat it in a sandwich.
So, why not to eat nutella as a solid chocolate?
 You just need:
- Nutella
- Fridge
- Molds


Yesterday I was hungry, well I wanted something with sugar... you know, a dessert! P:
So I looked my little (huge) nutella jar! I don't know if you fell weird eating it because it is too sticky, even when you eat it in a sandwich.
So, why not to eat nutella as a solid chocolate?
- Nutella
- Fridge
- Molds
1. Put some nutella inside the molds 2. Let the chocolates in the fridge for 2 hours approx.
3. Take out the chocolates form the mold and eat them!
If you want your chocolates to stay hardened, let them in the fridge until you eat them.
You can also make these little chocolates for parties or for christmas! Just change the molds!
I hope you like this little idea! Happy Monday.
How to make kawaii drawings...

Hi there!

These are some tips for making your drawings style kawaii:

When you add the eyes in the same line of the mouth, (in any kind of drawing) it definitely makes the face look even more cute.

Try it! there is a huge variety of expressions for your kawaii drawings.


 If you made a drawing and you are not... you know, shure about it, this is the perfect way to give a little refresh to your old drawings & reuse them! It also works with any kind of photo, just add the little faces to the objects and enjoy!
This is a great alternative to make simple drawings beautiful!
It works almost with everything:

Monica
DIY: Fishtail braids...
Hi lovelies!
I love all kind of braids, so today I made a little video for you!
This are some braids I love:

Well, it is kind of the first video I am making for the first lime so I hope you like it!
I love all kind of braids, so today I made a little video for you!
This are some braids I love:


Well, it is kind of the first video I am making for the first lime so I hope you like it!
xoxo. Monica
Blogging lessons: II.

Today I read a message of a friend of mine... Sam, the lovely girl behind Rose Vintage & Threadesque... I just love her, she is an amazing person.
Well, I know that all of you have seen some cute blogs that when you click on a picture they take you somewhere else. This is actually a great way to attract people to your other pages!
This is something really simple, you just need this code:
<a href="THE LINK"><img src="YOUR IMAGE'S URL" /></a>
When you type it it looks like this:

Just copy the URL you want it to appear when the picture have a click and in the other side, just add the image's URL. A good place for getting the URL of an image is TinyPic.
This is a simple image HTML code:
<img src="http://i43.tinypic.com/23r4j1w.jpg" />
And when you type it it looks like this:

It's something pretty simple and useful!
Happy blogging!
xoxo. Monica
Labels:
Blog design,
blogging lessons,
easy,
lessons,
tutorial
DIY - french braid
Hi lovely people!
Today is my sister's birthday, so she asked me to make her a french braid.... they are too much fun!
You just need some time and an elastic band!


xoxo. Monica
Today is my sister's birthday, so she asked me to make her a french braid.... they are too much fun!
You just need some time and an elastic band!


1. Comb your hair. 2. Start with a small section on top of the head. 3. Start the braid and keep incorporating some other pieces of hair to the braid. 4. Finish the braid with a curling iron... (my favorite part!) 5. Enjoy!
xoxo. Monica

