Showing posts with label Blog design. Show all posts

About the new design!

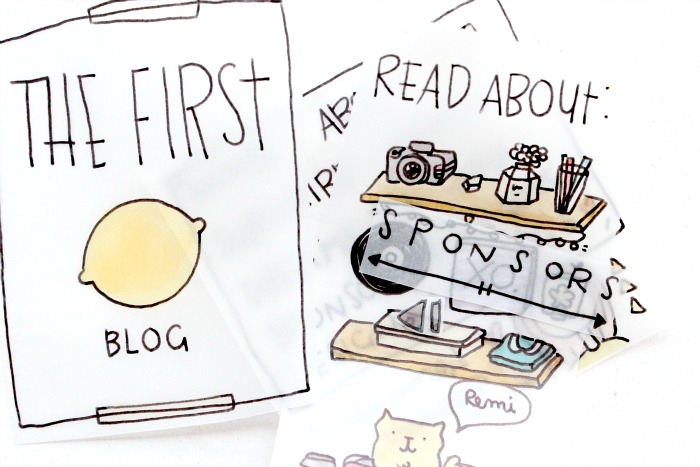
So... I gotta say WELCOME! I've been changing the design so that's why I closed the blog for some time! Sorry, I am in exams, so I thought it would be ready before, but I just couldn't finish before (: Anyways I really hope you like it!! Now you can see bigger pictures on the posts! I also added a small kind of "news board" to let you know about the new things and projects just by stopping by (: I first made this design by hand, with some topic markers and transparent paper.. my first idea was to photocopy them, or something like that. But I couldn't get a good quality, so I better made it on Sketchbook. There are lots of new things around here, I just got a record player (thing that makes me too happy!) I am also starting to play guitar! I actually know how to play piano, but I am just starting with guitars, so I think I'll upload some videos later:3 How have you been? I've been missing you, Remi also! I hope to post more during the weekend. 


Have a great day! xo. Monica

How to install the Basic layout


Okay, so as I promised, a video tutorial for the ones who want to install the "Basic layout" I made for you! Sorry If I make any grammar or pronunciation mistake D: I am still learning English (: Also, if you have any doubt leave me a comment and I'll be glad to help you! xoxo.

"Basic" a free layout

Hello there! Well, I've got lots of emails recently asking for help with blog designing. So I decided to make a basic one, from me to you! I deleted the shadows of the images and the blog. (I don't know but when I got started in blogger I just hated those shadows!) I added some buttons too, and no navbar ^_^ I just ask you for a big big favor if you download the template, please add the attribution image at the bottom, it is just for giving me a little credit and letting other bloggers find this free layout! I am making a small video to teach you how to install the theme, I am just so excited that I wanted to share it now, NOW! (: You can visit the live preview here.
You can find the Code here.

Hello, Hello! Well, I am going to start blogging more about blog design, you know, coding, images, html (: So, to begin with I want to show you how I removed my blog's Navigation Bar. Just follow the steps of the video I made trying with Remi's blog. This is the code:

#navbar { height: 0px; visibility: hidden; display: none;}

(: If you have any question or doubt I'm here to help.
Much love, Monica

a Remi Blog

Yesterday I started making a blog for  little Remi, it is just for some random and fun stuff! Photos, and some cartoons. We hope you like it! You can visit "a Remi blog" I'll be posting daily stuff, as it is easier just to post cute pics and cartoons than making more structured posts like the ones I like to do for The First Lime. I'll be answering all the emails I've got from lovely readers today (: I'm just getting more and more every time, which is awesome, but also a tough work, so please be comprehensive, I try my best to reply them all but sometimes it is too overwhelming for me. Have an awesome day! xo.

DIY "grab my button"

Hello there! Well, sometimes most of the traffic (or a really good amount) comes from other blogs that have your button. But as HTML coding can be tricky and stressing I found another way of getting a "grab my button" code! 

Just go to this awesome site. and fill in the gaps, it is pretty simple and the results are great! Here is one of the new buttons I made.

PS. Thanks so much for all the comments of yesterday! I really enjoy reading them:3
Have a lovely day! xo.
The first lime

Blogging lessons: II.

Hi!
Today I read a message of a friend of mine... Sam, the lovely girl behind Rose Vintage & Threadesque... I just love her, she is an amazing person.

Well, I know that all of you have seen some cute blogs that when you click on a picture they take you somewhere else. This is actually a great way to attract people to your other pages!
This is something really simple, you just need this code:

<a href="THE LINK"><img src="YOUR IMAGE'S URL" /></a>
When you type it it looks like this:

Just copy the URL you want it to appear when the picture have a click and in the other side, just add the image's URL. A good place for getting the URL of an image is TinyPic.

This is a simple image HTML code:

<img src="http://i43.tinypic.com/23r4j1w.jpg" />
And when you type it it looks like this:


It's something pretty simple and useful!
Happy blogging!

xoxo. Monica

Blogging lessons: I.

Hi lovelies!
Today I want to teach you a bit about the navbar of blogger:
The blue one is the default of almost all the blogger's themes. Sometime it fits with the colors of our blog's design, but if not this could be an ugly detail of our blog. Personally, I don't like to hide the navbar because you can search words and tags of the blog with it. If you want to keep the navbar and make it look cute, just follow these simple steps:

- Design | Navbar & then you can choose one of this styles:
And done!
I know this is really basic and simple, but I remember that when I made my first blog this little detail was really annoying.

xoxo. Monica